Cutting Simply Gene Raven's Hair
Before and After
Introduction: As I said in my Simply Gene and Shooting Star pages, although I love the flexibility of Simply Gene Raven, I really hated the super-long, thick, curly, messy pony-tail. I almost regretted that I had to lose Shooting Star, because her simple hair style was much more attractive. Each Simply Gene comes with a sheet which tells you how to fix Gene's hair into five different styles, several of which, actually, all of which require some cutting. However, after all the trouble about people's Simply Gene elbows breaking, I was really unsure about cutting Gene's hair, because the Gene catalog states that the 360 day return guarantee does not apply to Simply Genes who have had their hair cut. I was afraid that I would have trouble with Gene's elbow in the first 360 days, and that if I had already cut her hair, I would not be able to return Gene. Well, after waiting about two months or so (bringing us up to late May) I decided I couldn't stand Gene's pony-tail any longer (also, it was Memorial Day, and the power was out that day, so I had plenty of time on my hands). So, with much trepidation, I cut Gene's hair.
A Note on the Photographs: There really isn't much information on-line about cutting and arranging Gene's hair. Also, not many 'Gene people' have been able to advise me about it. So, during the whole process of cutting Gene's hair, I took pictures so that I can (hopefully) help others who want to cut Gene's hair. Also, I took pictures so that I could remember how Gene's pony-tail had been put together in case I wanted to re-do it sometime. Anyway, here are the pictuers!
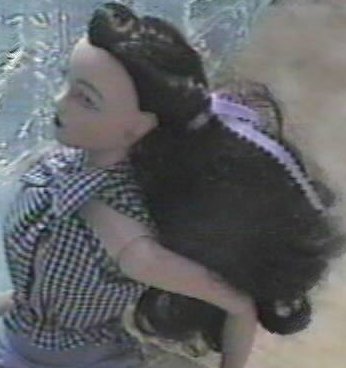
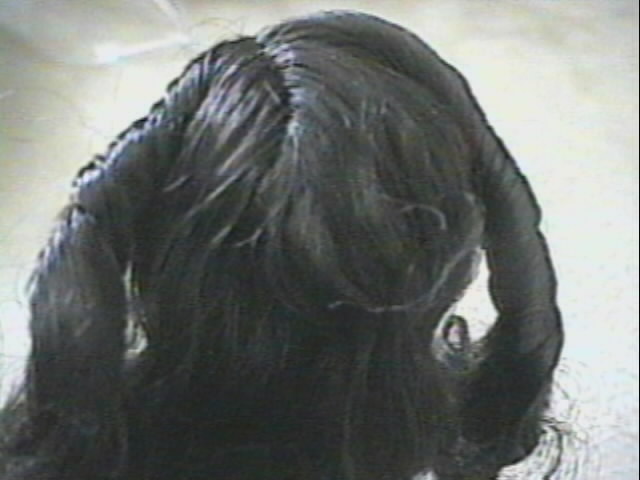
Step One - Getting Ready: The first thing I did wad debate in my mind whether or not I should do this crazy thing. Then, I looked more closely into the hair ribbon in Gene's hair. I knew it was sewn on, because when I turned Gene upside-down, I could see the threads sticking out of the bottom of the hair ribbon. So, I just assumed that the ribbon was sewn into her hair in order to secure the pony-tail. When I decided to take the ribbon out (and therefore, take the pony-tail out), I cut the thread. And to my suprise, the ribbon was sewn on only to hide a plastic rubber-band around Gene's hair. So I could have taken that ribbon out 'safely' ages ago! Here's what Gene's hair looked like after I took the ribbon out:
You can see that the hair had been rolled on both sides, and secured in the back with a white plastic band which does stretch, but will not (I am told) snag Gene's hair the way a real 'office' rubber-band will.
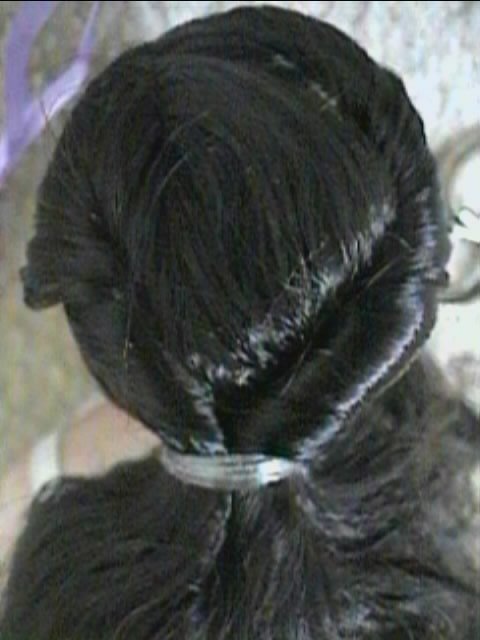
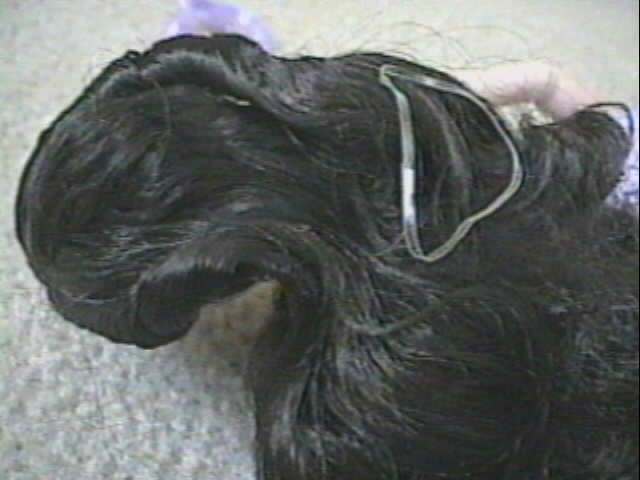
Step Two - Taking the Pony-Tail Out: I then made up my mind to just take out the pony-tail. After seeing what it looked like, I would then decide whether I would cut it or not. The picture on the left is Gene's hair once I took out the rubber-band. Since the band (you can see it on top of the hair on the picture on the left) does stretch, I didn't need to cut it (and I was really glad I didn't cut it, because I used it again later on). The picture on the right is after I separated the two rolls from each other. Both rolls are just sections of hair, rolled tightly (so tightly, in fact, that I had to really brush them out before they would lay flat at all) up to the part in the center.
 _______
Well, after brushing out the hair so that it lay flat, I played with the hair, trying to see if I could do anything with it. There wasn't a whole lot I could do, because the hair in its original state was just too long and thick. However, I thought, after playing with it, that if I cut it I could probably do at least a few styles. So, saying a quick prayer, I took up my sissors. And yes, I really was nervous. I had done enough 'playing' that I thought I could probably devise some style to cover up my mistakes if I really did a bad cutting job, but I was still nervous.
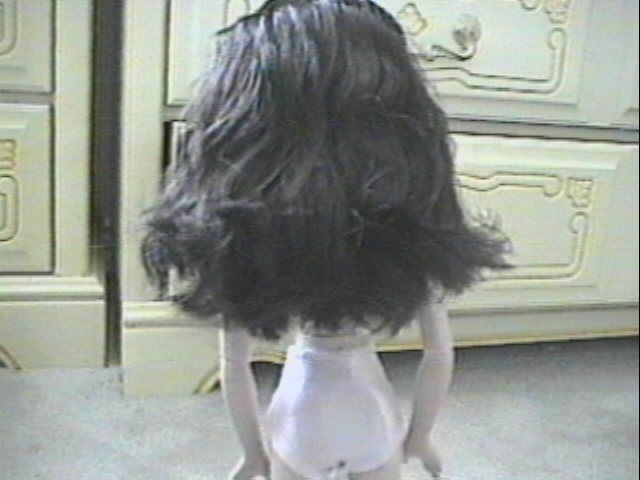
Step Three - Cutting the Hair: Now, I couldn't very well take pictures and cut at the same time, so I don't have any pictures of me actually cutting the hair. Basically, all I did was hack. I just took a section of hair, and cut off about an inch or maybe a little less. I think I cut up just above where the bottom curl began. And all I did was hack off tha section. The problem, I knew, would be to take a second section and cut it at the same level, so that it matched the length of the first section. This was made harder because I had not wet the hair (which, in retrospect, I should have done -- that's how they do it in real life, and it would have made things much simpler), and so the curls made the hair bounce up here and there. Well, after taking and cutting enough sections to complete the first layer of hair, I paused. The hair really wasn't too even, but it wasn't too obvious because of the curls. Even though I had cut off quite a lot, it still looked really long. Here's how it looked:
Now that almost looks like the original length of the hair, doesn't it? But it's not. I tried putting Gene's hair into what I call a "half-up-half-down" (in which you just gather up the top hair into a little pony-tail, letting the rest just hang; this is how Shooting Star's hair is done). It looked nice, but the hair was still too long for my tastes. So, gathering up my courage, I got ready for a second attempt at cutting.
Step 4: - Cutting Again: I used the same procedure as before, taking sections and trying to make them all even. I cut much less of this time, and I actually made the hair even more uneven (perhaps the first time was just as uneven, but because there weren't as many curls high up, the second uneven cut was more obvious). I tried to go for just below shoulder-length, as I thought this would be the most versatile. Also, if I made it any shorter, and messed up, it would be more obvious, and it would be harder to cut the hair shorter to correct my mistake.
Step 5 - Preparing to Arrange: Anyway, after cutting the hair (and making it rather uneven), I decided to wet the hair. Although I know a lot of people actually wash Gene's hair, I just used a comb to do this. I took Gene with me to my bathroom, wet the comb, and then ran it through Gene's hair (I had to do this many times in succession to get her hair wet enough). When I had really damped Gene's hair, it was very obvious how uneven my cutting job was:
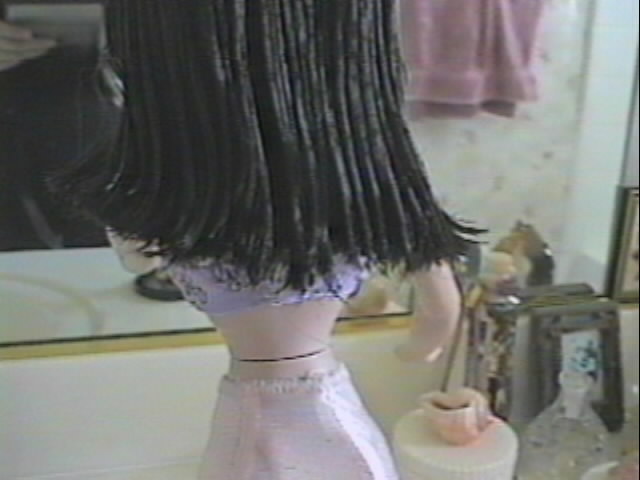
I trimmed the hair a little to even up the ends, but I made no attempt at shortening that right side.
Then, I decided that I really needed to dry Gene's hair before I could really see what it was really going to look like. So I dried it with a towel, and frizzed it up a little. And lo and behold, a bunch of curls appeared! Here's what they looked like:
Then I took Gene back to my room (i.e. the 'salon'). While I was there, I took this picture of the hair I had cut off Gene to give you an idea of how much hair I had to take off of her:
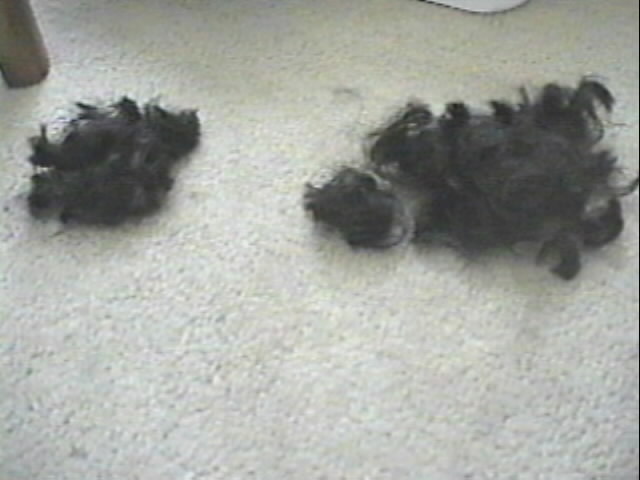
The pile on the right was from the first cut, and the pile on the left was from the second cut. I ended up bagging all this hair, because I may someday be able to use this stuff in filling out an up-do or something.
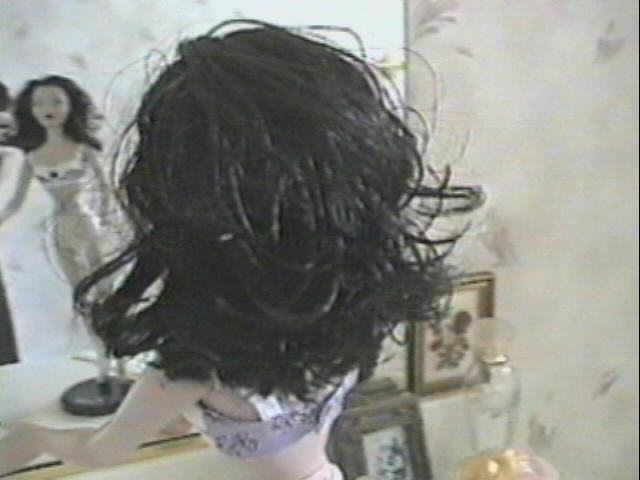
Step 6 - Arranging: After drying Gene's hair some more (but it was still a little damp) I combed it out. I was already beginning to feel quite pleased with her hair (and I had long since begun to feel relieved). Here's what Gene's hair looked like combed back (and it looked better in person than in the picture):
Then, I put Gene's hair in a half-up-half-down:
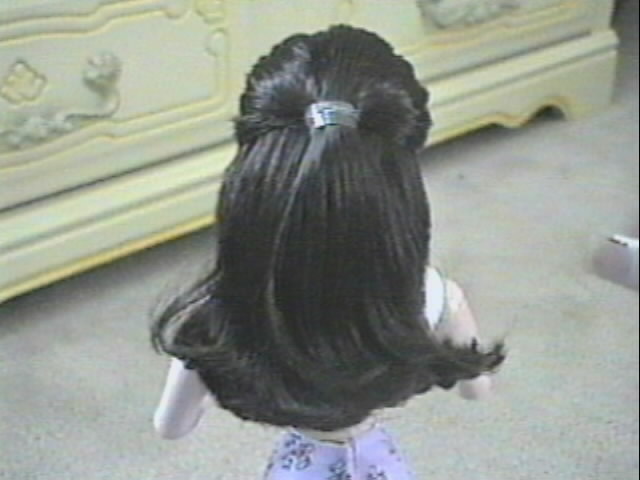
The hair looks better in real life than in the pictures. I used Gene's original rubber-band to secure her hair (right). It took me about 3 tries to get the style right, because I kept getting bumps and lumps. However, this wasn't a problem with the hair-cut; when I do this style on myself I still have trouble somtimes with lumps. Doesn't it look nice? And there's just enough curl in it, too. It now looks just like Shooting Star (except the hair is a little darker)!
I think I can do a lot more with Gene's hair than just a half-up-half-down (as shown). I can probably do several of the styles shown in Simply Gene's hair style sheet (and I couldn't have doen them with the original amount of hair). I probably could even do up-dos if I was skilled enough. But for the time being, I am perfectly satisfied with this simple style.
I am in no way affiliated with Ashton Drake or Mel Odom, other than as a proud owner of a Gene Marshall doll.
I do not necessarily endorse any of the advertisements displayed at the top of these pages.
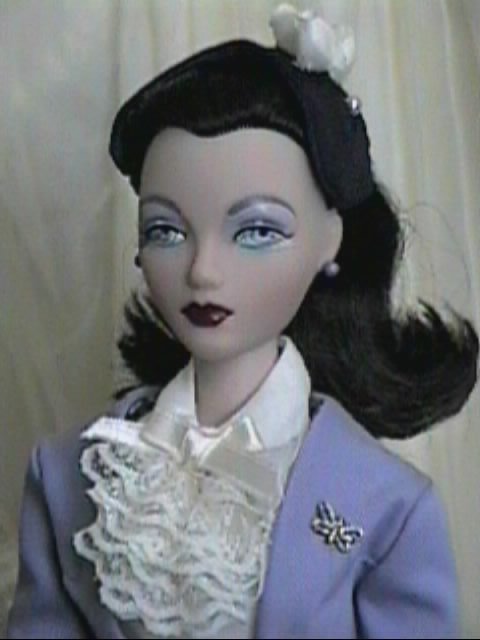
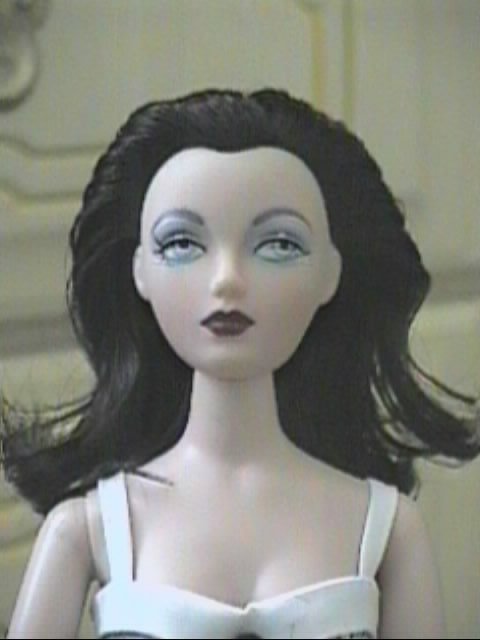
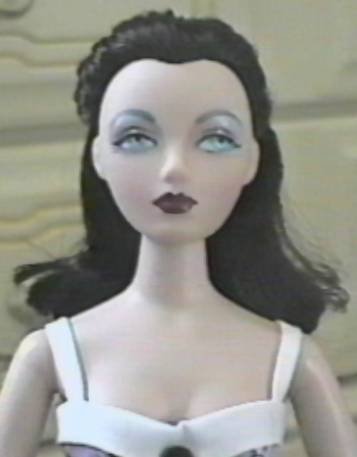
Simply Gene Raven is shown wearing 'Promenade' in the top two photographs (Gene is wearing the blouse from 'Blonde Lace' and the hat from 'Coffee Klatch' with 'Promenade' in the photo on the right). Simply Gene wears the Simply Gene Raven swimsuit in the remainder of the photos.
These pages were last updated on 06/02/01